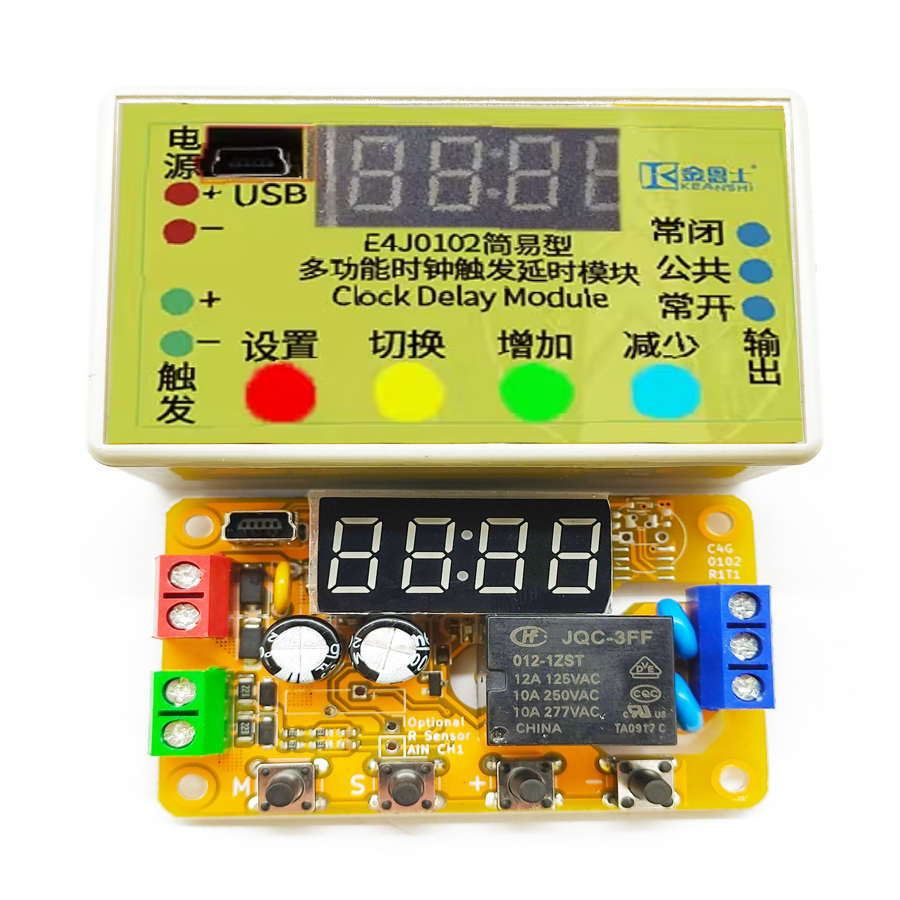
The program software adopts the shell technology. Some popular anti-virus software may have false alarm issues. Please add trust. This module is an economical MODBUS-RTU RS-485 analog input/output module with a dedicated integrated circuit as the core. It has 4 channels of analog/digital dual-purpose inputs with counting and 2 channels of transistor open-drain PWM outputs. The power supply voltage can be selected from 5V, 9V, 12V, 18V or 24V. All these configurations can be set through the RS-485 communication port and can be reset to the default settings via the USB port on the product, which are 9600 baud rate, 8 data bits, even parity and 1 stop bit.
Product Features
High Economy: Achieves standard MODBUS-RTU RS-485 communication function at ultra-low cost.
Four high-sensitivity, high-voltage-tolerant digital/analog dual-purpose inputs.
Two field-effect transistor open-drain PWM outputs, supporting a maximum capacity of 60V 2A.
Different versions support DC 5/9/12/18/24V power supply, and custom power supply voltages are also available.
Good Reliability: Basic power reverse connection, overcurrent, static electricity, fast pulse group, and surge protection. Basic output overcurrent protection and inductive load flyback protection.
Input Counting Function
Each digital input of this product has a counting function. These counters are DINnCNT and are located in the area starting from the holding register address 0x0040. They can be read and written respectively by using the "Read Holding Register" instruction (instruction code 0x03), "Write Single Holding Register" instruction (instruction code 0x06), and "Write Multiple Holding Registers" instruction (instruction code 0x10). Whenever a rising edge is detected on a digital input, the corresponding counter will increment by 1. Reading these counters can obtain the number of pulses on the corresponding digital input. However, the pulse frequency must not exceed 5Hz, otherwise the counting will be abnormal. This function is not applicable for counting those particularly high-speed inputs. The counter will reset to zero when it reaches 65535; any value can also be written to these registers to clear them.
Input Filtering Function
Each digital input of this product can be configured with an anti-interference and anti-noise filter. These filters are configured by DINnFLT and are located in the area starting from the holding register address 0x0060. They can be read and written respectively by using the "Read Holding Register" instruction (instruction code 0x03), "Write Single Holding Register" instruction (instruction code 0x06), and "Write Multiple Holding Registers" instruction (instruction code 0x10). When the value of a certain register is 0, the filtering function on the corresponding input pin is turned off, and any input value will be directly reflected in DINn. When the value of a certain register is not 0, the filtering on the corresponding input pin is enabled, and the input will be reflected in DINn only after it has been stable for more than the filtering time. The filtering time is determined by the non-zero value in the register; each unit value in the register corresponds to 1 millisecond of filtering time, and the filtering time can be adjusted from 1 millisecond to 65535 milliseconds. For example, setting the register to 500 corresponds to a filtering time of 500 milliseconds. After these registers are configured, writing the ASCII code "MS" (i.e., 0x4D53) to the MODESAVE holding register at address 0x0010 can permanently save the configuration of these registers non-volatilely.
Emergency Brake Function
The digital input terminals are also used as trigger inputs for simple delay functions and brake terminals for digital outputs. For more information on these functions, please refer to the relevant sections on digital outputs.
Analog Input and Sensor Power Supply Output Description
This product comes with four analog inputs, whose terminals are shared and correspond one-to-one with the digital inputs. The analog values on these input terminals can be read using the "Read Input Register" instruction (instruction code 0x04), and the corresponding registers AIN0 to AIN3 are located at input register addresses 0x0020 to 0x0023. These two registers are both 16-bit, with the least significant bit representing 0.001V, or 1 millivolt (mV). The effective resolution of the four analog inputs is actually 8 bits, and the accuracy is typically 3% over the entire range.
Digital Output Description
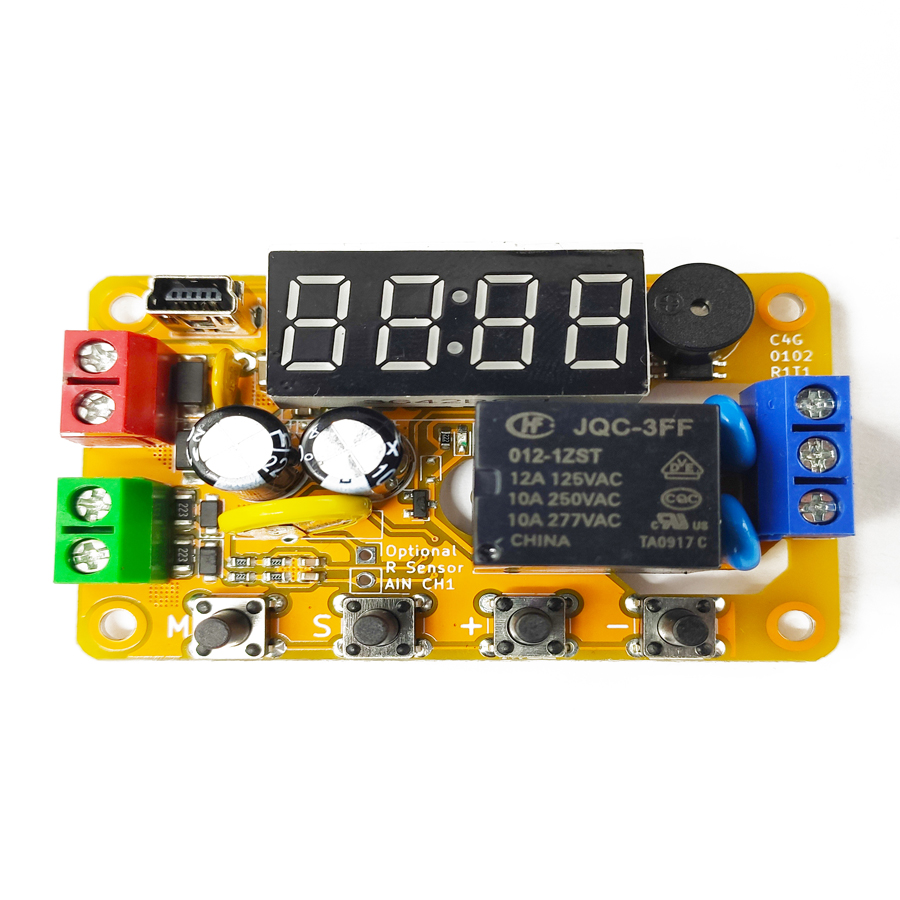
The digital output terminals of this product are a group of relays or field-effect transistors. Each channel can be used directly as an output or in combination with a digital input to function as a simple timer delay. They also have pulse output capabilities, capable of outputting Pulse-Width Modulation (PWM) or Pulse-Train Output (PTO) signals. When any digital output channel has a signal, the corresponding output indicator light inside the product will light up. When the product is powered on or off, all digital outputs may briefly connect for about 50 milliseconds [2]. This phenomenon is particularly prominent in transistor output types [3] and may cause misoperation in some devices that respond to extremely short pulses. If this situation is not allowed, relay-type products can be selected, or it can be ensured that the controlled device is powered on after this machine is powered on and powered off before this machine is powered off.
Digital Output Configuration
Each digital output is controlled by four coils and a digital output configuration holding register to determine its output state and output mode. The names of the four coils controlling the nth digital output are output value DOUTnDV, output reset DOUTnRST, output forced value DOUTnFV, and output forced function enable DOUTnFEN; the name of the digital output configuration holding register is DOUTnCFG. The DOUTnCFG register group is located in the area starting from the holding register address 0x0080. Each coil can be read using the "Read Coil" instruction (instruction code 0x01) and written using the "Write Single Coil" instruction (instruction code 0x05) or the "Write Multiple Coils" instruction (instruction code 0x0F). In the "Write Single Coil" instruction, writing 0x0000 disconnects the coil, writing 0xFF00 connects the coil, and writing other values results in an error. Each register can be read using the "Read Holding Register" instruction (instruction code 0x03), written using the "Write Single Holding Register" instruction (instruction code 0x06), or written using the "Write Multiple Holding Registers" instruction (instruction code 0x10). Reading from non-existent coils and registers will return 0, and writing to them will have no effect. DOUTnDV determines the value of the output, DOUTnRST is responsible for resetting the output; DOUTnFV determines the value when the coil is forced, and DOUTnFEN determines whether the coil forcing function is enabled. The DOUTnCFG register determines the working state of the output, such as the working mode, braking mode, output polarity, and delay time in the delay mode, etc. Modifying the content of the DOUTnCFG register during the operation of any function will immediately stop the existing function on this output and switch to the new function. The factory default value of DOUTnCFG is 0x0000, and its bits and their meanings are as follows. After the configuration of this register is completed, writing the ASCII code "MS" (i.e., 0x4D53) to the MODESAVE holding register at address 0x0010 will permanently save the configuration of these registers non-volatilely.
Software Configuration
When the module leaves the factory, the default serial port configuration information is as follows: slave address is 0x02, baud rate is 9600, parity is even, stop bit is 1, and data bit is 8. Using the Windows system, start the upper computer debugging software, switch to the basic configuration card page, select the default serial port configuration in the "Module Connection" area, and click the "Connect Module" button. The bottom status bar will display the connection status. If there is an error, an error prompt box will appear. In the "Serial Port Configuration" area, select the new serial port configuration information. The serial port configuration information can be determined by the gateway. Assuming that the gateway's serial port configuration is a baud rate of 115200, even parity, stop bit of 1, and slave address of 0x03, then according to the gateway configuration, select the corresponding serial port configuration and click "Write Configuration". Wait for the upper computer command to be sent completely. After the serial port configuration is written successfully, connect and test using the new serial port configuration. After a successful connection, read and write the output coils and read the input status through the "Input Output Read/Write" page. After verifying that the communication is correct, it can be connected to the gateway and communicate with the gateway.
Frequently Asked Questions
What communication protocol and interface does the B2J0405 use?
The B2J0405 is a MODBUS-RTU slave over an RS-485 serial bus. It uses the standard function codes — Read Holding Register (0x03), Write Single (0x06) and Write Multiple (0x10) holding registers, plus Read/Write Coil (0x01/0x05/0x0F) — so it drops into any PLC, gateway or SCADA system that speaks MODBUS-RTU without proprietary drivers.
What are the default serial port settings, and can I change them?
The factory defaults are slave address 0x02, 9600 baud, 8 data bits, even parity and 1 stop bit. All serial parameters (including baud rate up to 115200 and slave address) are configurable through the RS-485 port using the upper-computer software, and the whole module can be reset to factory defaults via the on-board USB port.
What load can the transistor outputs drive?
The B2J0405 has two field-effect transistor open-drain outputs rated for a maximum of 60V 2A each. They support on/off switching, simple timer delay, and pulse output as PWM or PTO signals. Because they are open-drain (sinking) transistor outputs rather than relays, they switch faster and have no contact wear, ideal for driving solenoids, LEDs and small DC loads.
How does the input counting function work and what is its frequency limit?
Each of the four digital inputs has a counter (DINnCNT) starting at holding register 0x0040. A rising edge increments the counter by 1, and it rolls over to zero at 65535; you can also write any value to clear it. The pulse frequency must stay at or below 5Hz, so it suits part counting and slow event logging rather than high-speed encoder signals.
Should I choose a transistor output module or a relay output module?
Choose the transistor version for fast PWM/PTO switching, long life and DC loads up to 60V 2A. Note that on power-up or power-down all digital outputs may briefly connect for about 50 milliseconds, which is more pronounced on transistor types. If that brief pulse could cause misoperation, select a relay-output variant or sequence the power so the load energizes after the module.

.jpg)